So you bought a new iPod Touch . You have heard a lot of those cool games and cool applications that runs over it . You opened up iTunes and excited to see what is in store for you . Last thing you know , Apple is asking you for a credit card number . Boom ! all that excitement is gone.
For an average iPod owner who does not have a credit card number or does not want to have one , applying for an Apple ID to get hold of those freebies and goodies Steve Jobs has to offer is a pain in the ass . But there are several ways to get over with it . One , you could buy a iTunes gift card and redeem it . This is good , if and only if , gift cards are available . Two, try jailbraking your iPod touch and risk voiding its warranty . Lastly , read on and follow the steps below. Just a note , I assume that you are responsible enough to take care of yourself . Take note that even if the software is free , a billing statement will be sent to you registered email address . And if you intend to buy one , pay for it.
1. Launch you iTunes application and go to the iTunes Store .
2. Scroll down to the bottom of the page and select the country. The country is significant , different country can mean different offered applications.
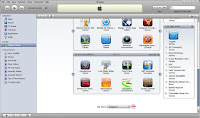
3. Go to the Top Free Apps widget and click on the top free application.
4. Clicking on the Get App button prompts you to enter your AppleID , select Create New Account.
5. Proceed and create a new AppleID account.
6. If you got all the previous steps working , you may be able to see the "NONE" option on the Payment method section.
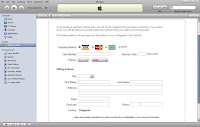
7. Select the NONE option and provide the billing information . Make sure that your address is a valid address from the country you have choosen in Step 2.
8. Click CONTINUE and you are good to go.
Comments